This article covers initial setup and configuration for the Gem ATS.
Requirements
Your Gem team must have the Gem ATS feature enabled in order to follow these instructions. If you do not have this feature but are interested in adding it, please contact your Gem Customer Success Manager.
Your Gem user must be an Administrator in order to configure Gem ATS. If you need to configure Gem ATS and are not already an administrator, please contact one of your existing Gem administrators to have your account permissions changed.
Configuration
Gem ATS configuration is available from the Gem ATS Settings page. You can access the link directly, or click your Gem Profile name at the bottom left of your screen, then select "Admin settings" and click on the Gem ATS tab to access this page.
From the ATS Settings page, you have the option to configure your organization and to set up your job board.
Organization
The Organization tab lets you create or edit your team’s Departments, Sources, and Locations.
Departments
Departments provide clarity on where each role fits within your company’s functional areas. Every job you create will be assigned to a department, helping you stay organized and efficient—and with the added benefit of actionable departmental metrics as you begin hiring. Plus, your job board will automatically sort openings by department, helping candidates easily navigate and find relevant roles.
You should create at least one department for your jobs. To do so, click into the Jobs section, and then Departments to expand it, then click “+ Add department” in the top-right corner. Once you’ve given the department a name, click “Save.”
To edit the name of an existing department, click the Departments section, then locate the department you wish to edit. Click the pencil icon on the right side of the section, then edit the name and click ‘Save’.
Sources
Tracking sources in your ATS helps you identify the most effective recruiting channels, allowing you to optimize your strategy and measure the ROI of your efforts. Gem ATS comes with several default sources pre-configured:
- Company career site
- Gem Sequence
- Github
- Indeed
- Internal candidate
- LinkedIn Basic Jobs
- Referral
While these default sources can’t be edited or removed, you can disable them if they’re not relevant to your hiring process. You can also add additional sources to capture other candidate channels.
To add a source, click the ‘Sources’ section, then click the ‘+ New Source’ button. Enter a name for the source, then choose what category the source belongs to. When both are done, click ‘Save’.
You can edit a custom source by clicking the Sources section to expand it, and then finding the source you would like to change in the list. Click the pencil icon on the right side of the section, then change the name or category as desired.
You can enable or disable an individual source by clicking the ‘Enabled’ slider for that source. Disabled sources cannot be selected when adding a candidate to a job.
Locations
Locations allow you to specify the geographical area of a job, including the city, country, state or region—and even different office names to distinguish locations within the same city. Each job you create in Gem ATS will be associated with one or more locations, which will be displayed on your Job board.
To add a location, click into the Jobs section, then Locations, and click “+ Add location” in the top-right corner. As you search for cities by name, Gem will auto-fill the appropriate country and region (you can also enter them manually). Optionally, you can add an office name. Click “Save” when complete.
Note: If your company is 100% remote, you must create a location in the state where your company is incorporated and check the “Remote” box. Alternatively, you can name the location “Remote” for better organization, but a state or region must still be assigned.
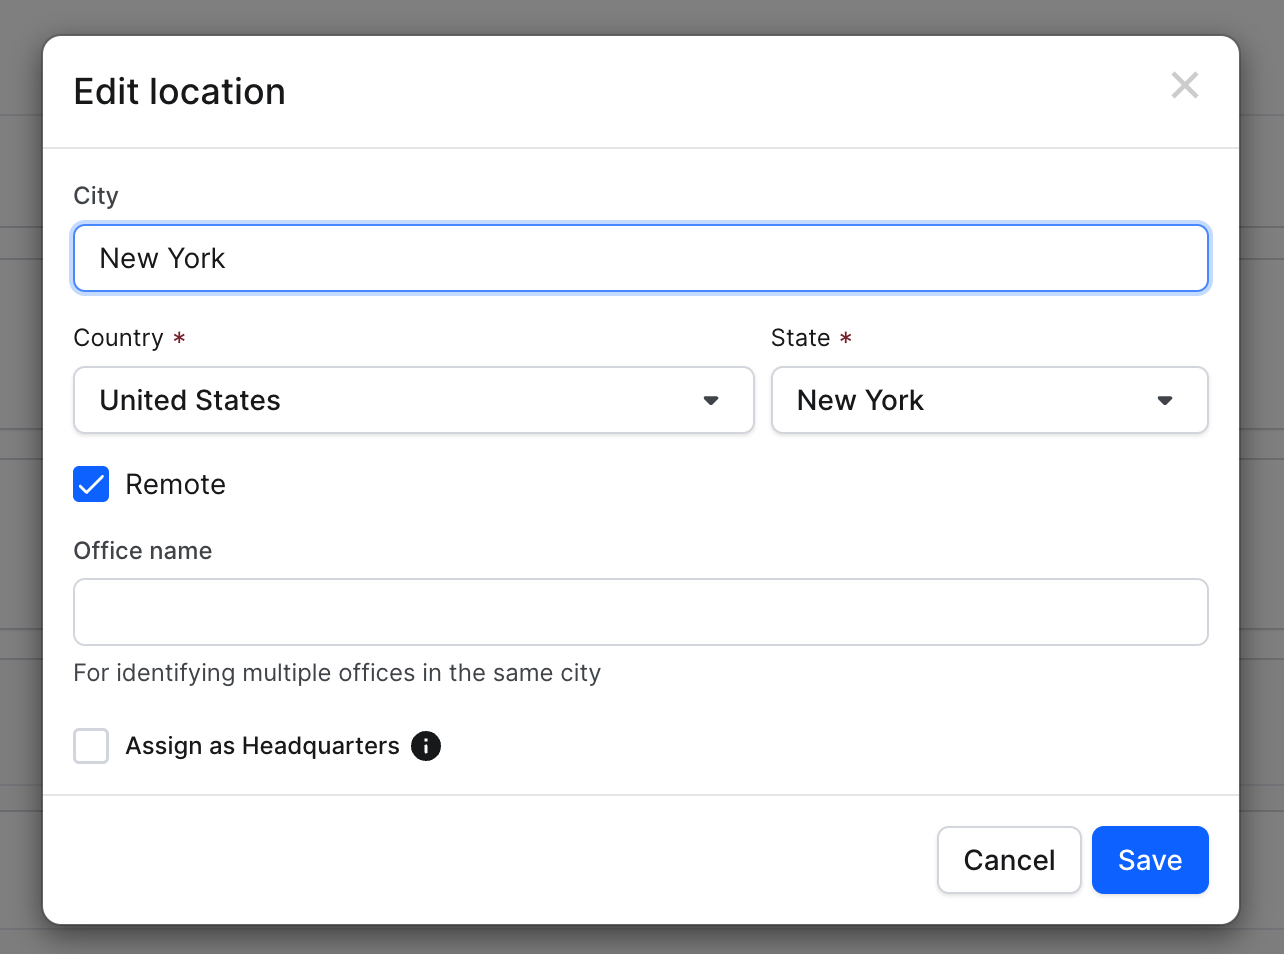
Another option would be to give the location a name with “Remote” in it to help with organization.
Rejection and dropout reasons
Tracking rejection and dropout reasons is essential for refining your recruitment strategies and enhancing the candidate experience. By systematically capturing and analyzing this data, you can identify patterns, address potential issues, and reduce unnecessary candidate drop-offs, leading to a more efficient and effective hiring process. As with sources, Gem ATS comes with a set of pre-configured rejection and drop-off reasons:
Rejected reasons:
- Duplicate
- Lacking qualifications
- Moved to another role
- Not a cultural fit
- Role cancelled
- Role filled
- Other
Dropped out reasons:
- Accepted another offer
- Compensation
- Timing
- Unresponsive
- Wasn’t interested
- Other
While these default reasons can’t be edited or removed, you can disable them if they’re not relevant to your hiring process. You can also add additional reasons to capture other candidate and hiring team feedback.
To supplement your list, go to the Application section, then Rejection and dropout reasons, and click “+ Add rejection reason.” Enter a name for the reason, then use the dropdown menu to choose the reason type (either “Dropped out” or “Rejected”). When both fields are filled, click “Save.”
To enable or disable a rejection reason, simply toggle the “Enabled” slider for that reason. Disabled reasons cannot be selected when dispositioning a candidate.
Job close reasons
A job close reason is the specific rationale recorded when a job opening is closed or taken offline. This could occur for a variety of reasons—the position gets filled, the role is put on hold, or the job is removed entirely due to budget constraints. Tracking job close reasons allows organizations to capture structured metadata about the fate of their job openings, providing insights into hiring processes and aiding in strategic decision-making.
Gem ATS comes with three pre-configured job close reasons:
- Cancelled
- Filled
- On hold
While the default reasons can’t be modified, deleted, or hidden, you can disable those that don't align with your hiring process. Additionally, you can create new job close reasons to capture specific outcomes of your job postings, providing more detailed insights into your recruitment process.
To create a new job close reason, go to the Jobs section, then Job close reasons, and click “+ Add job close reason,” fill in the name of the reason, and click “Save.” To enable or disable a job close reason, simply toggle the “Enabled” slider for that reason. Disabled reasons cannot be selected when dispositioning a candidate.
Notifications
Sending timely reminders to interviewers not only ensures preparedness and reduces no-shows; it also reinforces the importance of their role in the hiring process. Encouraging interviewers to promptly submit scorecards promotes a culture of accountability and streamlines the recruitment process, leading to more efficient and effective hiring decisions (read: faster, better hires).
In the Notifications section, you have the option to:
- Send reminder emails to interviewers before the interview
- Send reminder emails about scorecard submission after the interview
These notifications are enabled by default. If you or your team prefer not to receive them, simply uncheck the corresponding box.
Integrations
Gem ATS integrates with various platforms to streamline your hiring workflow. During your initial setup, be sure to connect the tools you already use. Below, you'll find step-by-step instructions for integrating with:
Have any issues or questions on this topic? Please feel free to contact your dedicated Gem Customer Success Manager directly or our Support team at support@gem.com.